Fish, Too

Hello! I am writing to you all from lovely Madrid, where it’s a balmy 14 degrees Celsius (57 F for those on the home front.) I know it’s been a while since I’ve updated, but in case the first sentence didn’t tip you off, I am now occupied with the life of an English teacher in Spain! Yes, it’s been fun and exciting past few months, mainly with the challenges that come with cooking dinner not as a side project but as survival. Thankfully I discovered a recipe for fish stew, which is perfect for those chilly autumn/winter nights. I first tried making this dish back in the height of summer, which turned out to be a bad choice. But now that it’s getting colder (see first sentence of this post) I might trot this recipe out again. This food is adapted from Dad’s Fish Stew over at simplyrecipes.com. I changed it around a little, namely by adding some celery and carrots, because I find that firmness of these vegetables adds good substance to stews. Potatoes also fall into this category, but I didn’t have any around the house when I started cooking.

Fish Stew

1 onion, medium/small dice

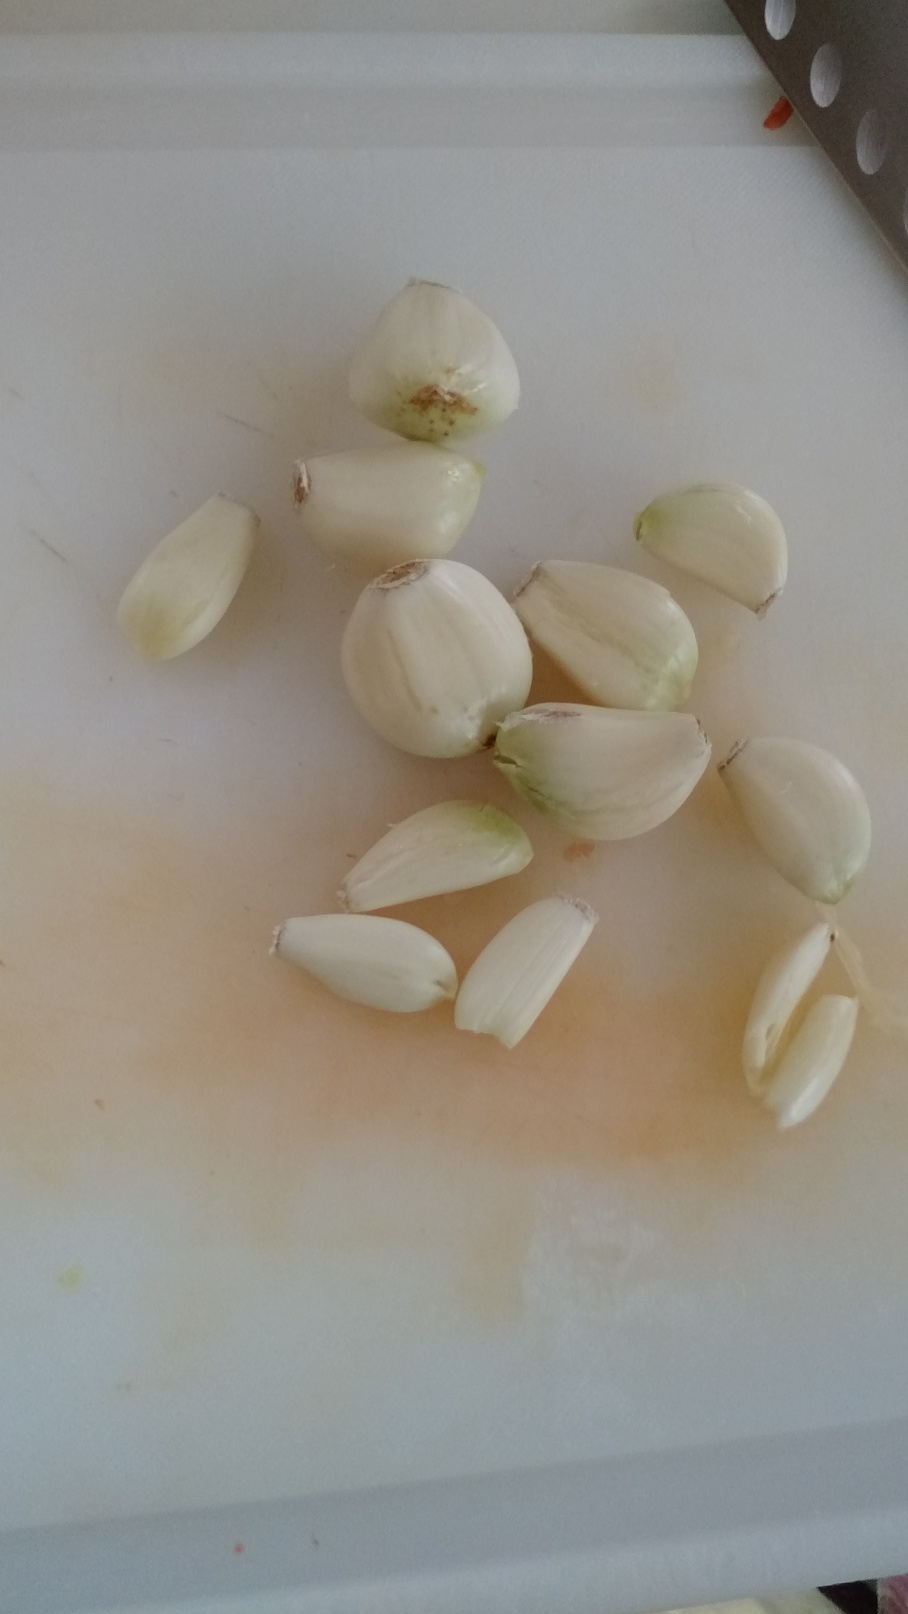
Garlic (as much as you want, I used 13 cloves. Lucky!)

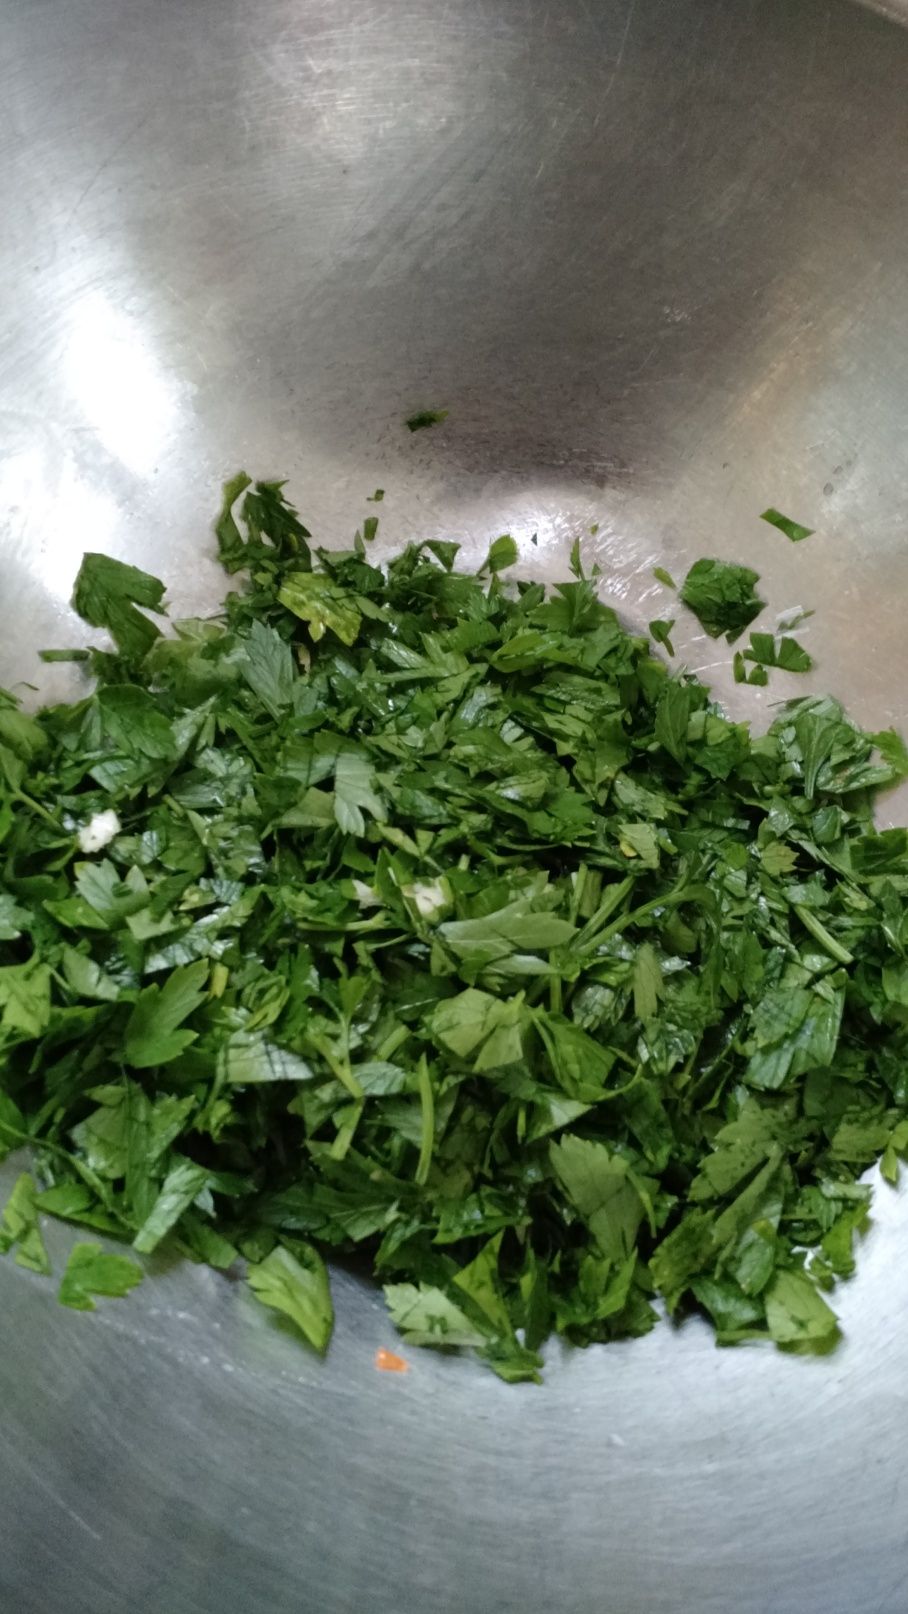
2/3 cup fresh chopped parsley

1 cup diced tomato (1 medium sized tomato)

2 tsp tomato paste (it’s slightly more expensive but if you get it in a tube, it will keep longer in the fridge)

1 cup clam juice

1.5 lbs fish fillets, cut into small pieces (I used cod, but any white fish will do, like pollock, haddock, or tilapia)

Salt, pepper, oregano, and any other spices you might like (see below)

ingredients

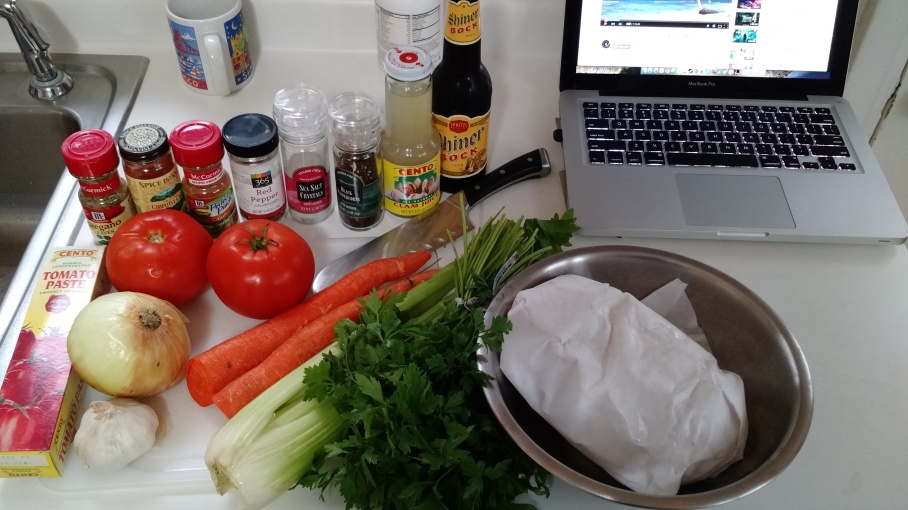
As you can see above, I also have some chipotle chili powder to add smokiness to the dish. Additionally, Cajun spice always goes well with fish. Finally, crushed red pepper flakes to finish puts some heat in it, if that’s your thing.

Start by peeling your garlic, and then going through the ritual of trying to get the garlic smell off of your fingers. A little tip I like is to use lemon juice when you’re washing up after, it works most of the time. I’ve also heard that rubbing your fingers on stainless steel before using soap works, but the only stainless steel object I could find was a chef’s knife, and I am not brave enough to try that yet.

peeled garlic

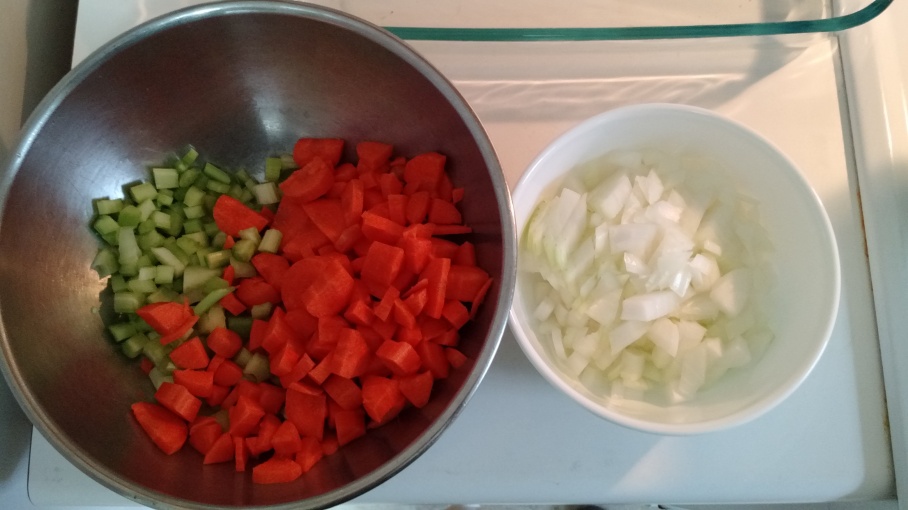
Now that your garlic is peeled, it should be minced. The other vegetables get diced.

celerytomatoonion

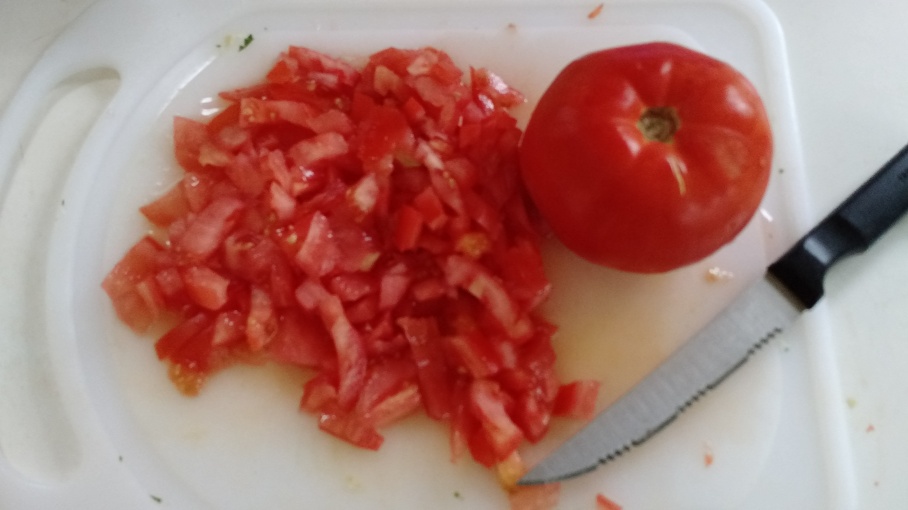
Don’t forget the tomato! Since this dish will be stewing a while, I didn’t feel the need to seed it first.

choppedtomato

And the parsley should get chopped.

chopped parsley

Whew! A lot of cut vegetables up in this piece. One thing I noticed while writing this post is that this stew contains three different styles of cutting vegetables – chop, dice, and mince. Might make a good writing topic for a future blog post, hmm…

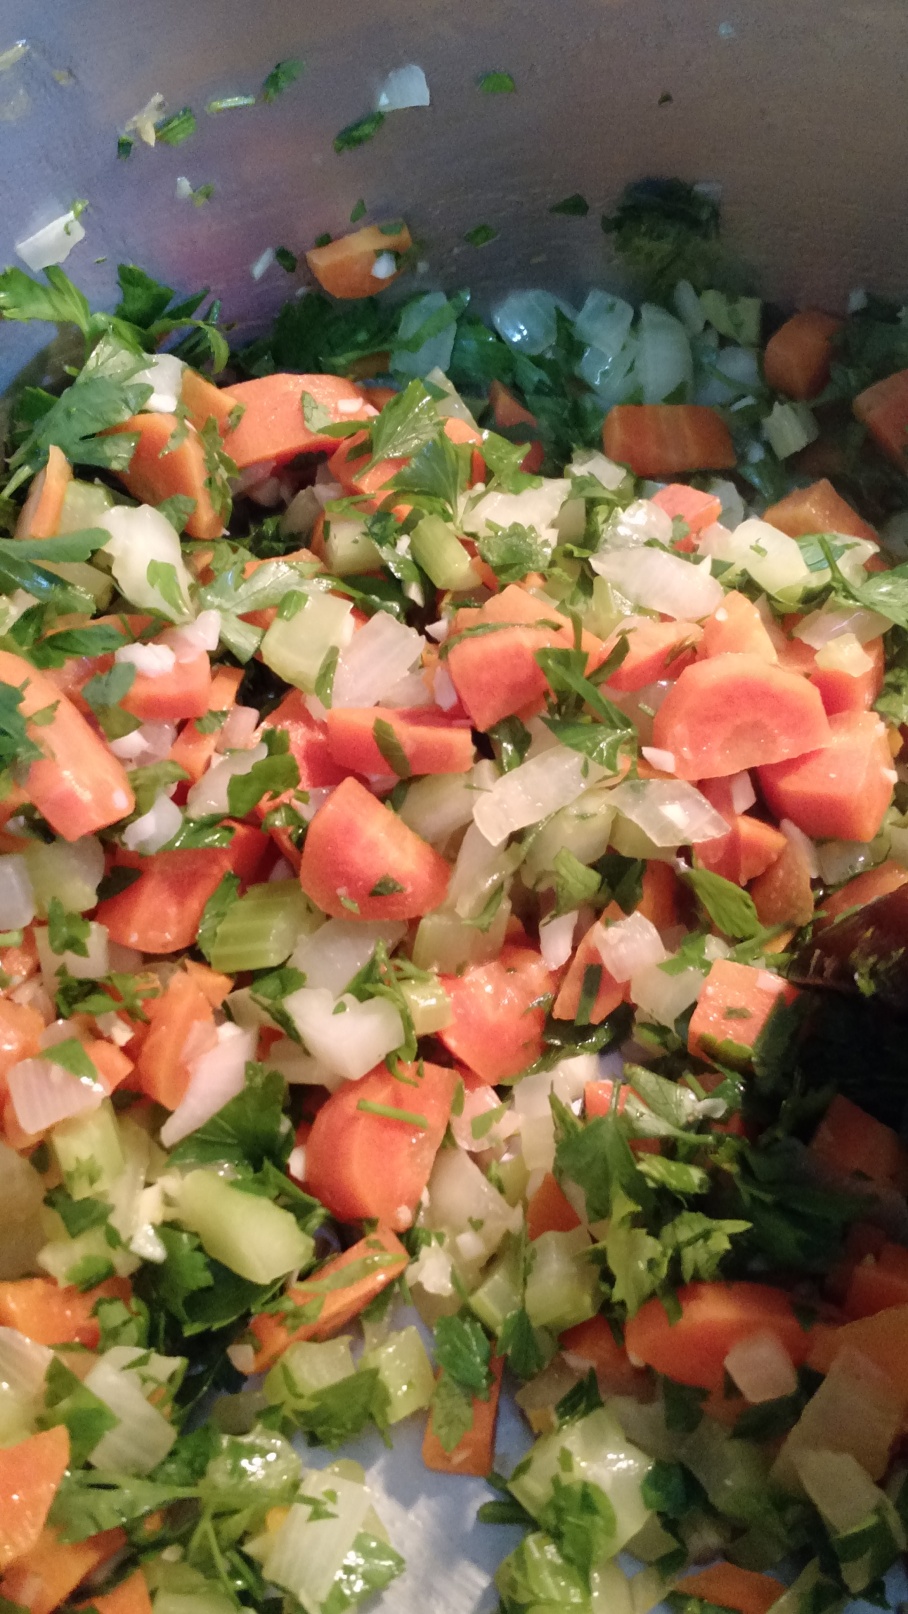
At this point, heat up some olive oil in a Dutch oven over medium-high heat and begin to saute the onion, celery, and carrot. I am not fortunate enough to own a Dutch oven, so I’m using the heaviest-duty stock pot I have (Note to self: ask for Dutch oven for Christmas.)

mirepoix

They should take about 5-8 minutes to soften, depends on how hot your burner is and how heavy your pot is. If you’ve got no sense of time, you can also see a vegetable’s doneness by watching the color leach out of the vegetables as well!

I would normally saute the carrots for longer, but since they’ll be simmering in a stew for a while, that will give them time to soften. If you’re making, for example, a stirfry and you want to use a firm vegetable like potato or carrot without getting hard chunks, parboiling is key.

At this point, stir in the parsley for a few minutes. Notice how the color is drained from the carrots and such.

addparsley

Then, add in the tomatoes and tomato paste.

addtomatopaste

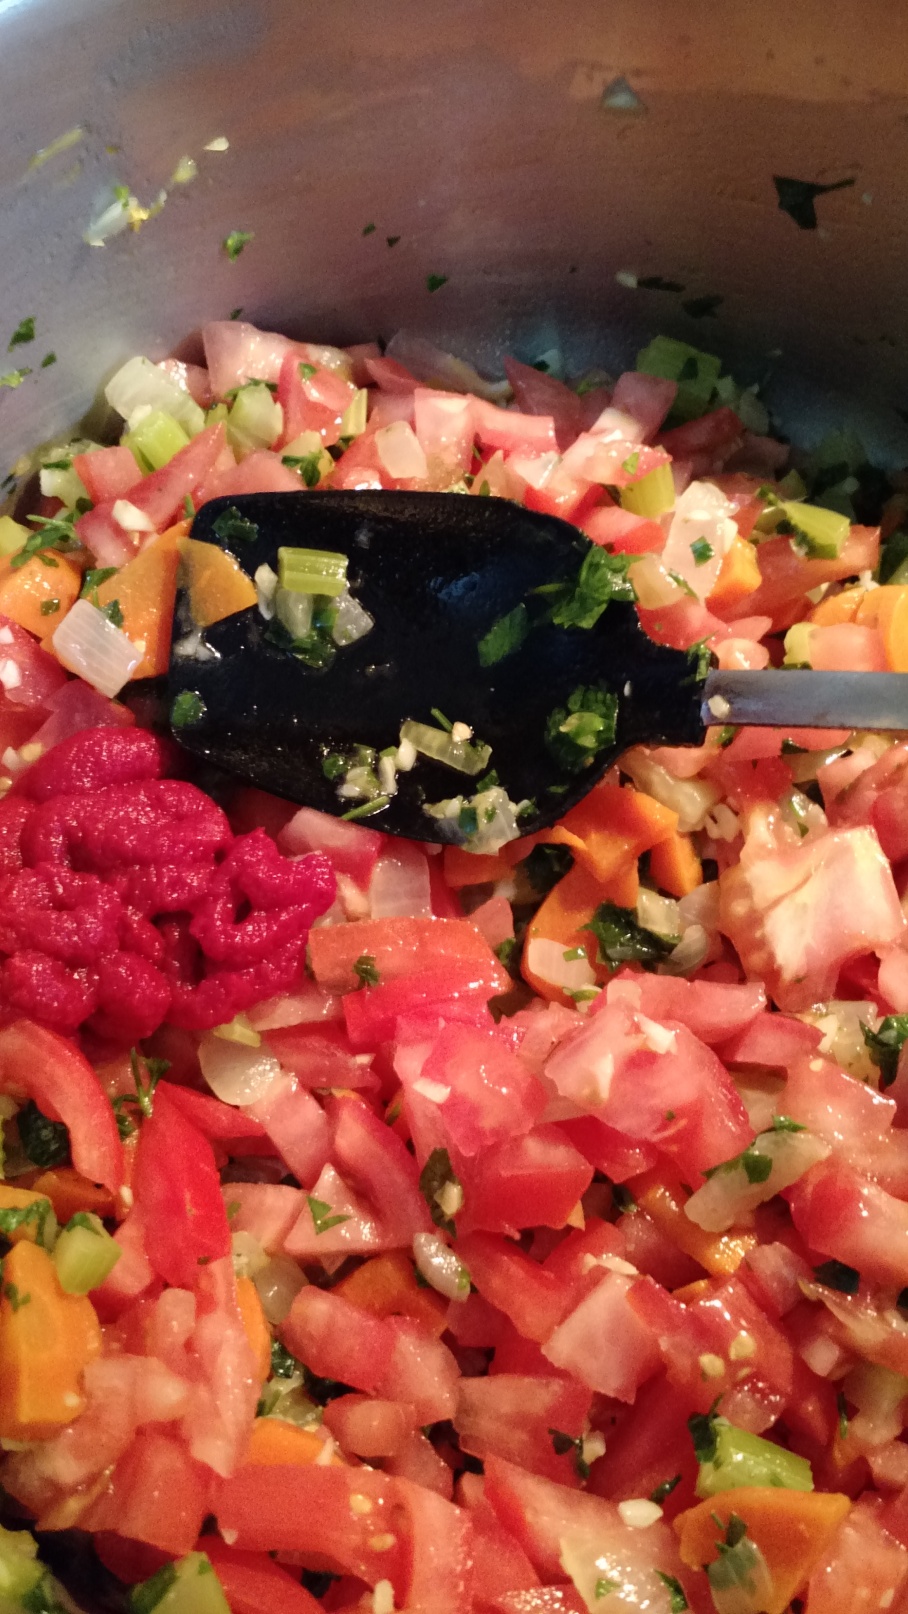
Stir it all up and cook for 10 minutes over medium heat. This is a good time to cut up the fish while the tomato is being incorporated. Actually, save yourself some time and ask whoever’s behind the counter to cut the fish up for you when you buy it.

seasonedfish

This is when I tossed the fish pieces in Cajun spices for extra stew flavor! If it’s been 10 minutes, add the fish and the clam juice to the pot. Water or fish stock (or part of the beer you’re drinking) can be added here if the stew looks a little thick.

addfish

Simmer the pot until the fish is cooked through, around 10 minutes depending on the size of the chunks. Now is also the time to add the various spices and seasonings that I picked out earlier. A little extra salt will bring out the flavor of the tomatoes in the stew, so don’t be afraid to Bam!™ it up a notch. Once the fish has turned white and starts flaking apart, it’s ready to be served.

done

There you have it! The stew pairs well with some pieces of crusty bread and fresh cilantro/leftover parsley. The piping hotness of this recipe is just the thing to keep you fueled up during those hot summer days cold winter nights. Enjoy!

Bizarro!

Happy (belated) (very belated!) New Year! I hope everybody had a good time, whether you were partying it up or observing privately. I apologize for not updating earlier, but I was away at a conference and then got caught up in the whole New Year thing. Also I had to go to Mardi Gras, go to another conference in March, move out of my apartment, accept some new projects at work, go to a music festival, and make a ton of excuses to not update this blog. But not to worry, I resolved this year to start updating twice a day. Speaking of, New Year’s is a time for changes, where we resolve to do something fresh, something new. For instance, many people choose to cut out meat or go vegetarian as a part of a New Year’s resolution. And rightfully so! Apart from the health ramifications, cutting meat out of your diet helps avoid contributing to a very harmful industry. I dug up some facts about people and meat. For example, did you know that in 2011, over 80 percent of antibiotics were sold to the meat industry? Additionally, did you know that you have a skeleton inside you right now? 

In the stark light of such dramatic facts, maybe it’s time I did something a little different. So, for New Year’s, I offer you something new, something fresh. Something… bizarro!

This recipe comes from Isa Chandra Moskovitz’s book, Vegan with a Vengeance. Isa Moskovitz created the Post-Punk Kitchen, a cooking show with a punk bent. Her book adopts a similar post-punk stance. In the ultimate post-punk move, Carlos found this book in the garbage and brought it into our house.

I was intrigued by this recipe from the very start, namely because we had extra chipotles in the fridge and I wanted to use them. But this recipe hit some notes that the other vegan recipes in the book didn’t. I’m not morally opposed to veganism, but my beef (heh) with most vegan recipes is that they lack substance. Mushrooms are usually a good hearty substitute for meat, but they don’t always do the trick. As I was browsing the soups and stew section, I came across a recipe for chipotle, corn, and black bean stew. Since my secret chili recipe is one of my specialties, the ingredients in this recipe stood out to me as familiar, so I decided it to make it. And it’s a good thing this recipe came out well, otherwise I would have dropped it like a hot potato. Seriously, there’s a ton of things I’ve made that have never made it to the light of day here. Consider yourselves lucky.

Chipotle, Corn, and Black Bean Stew

2 tablespoons olive oil

1 large onion, quartered and thinly sliced

5 garlic cloves (or more!)

2 teaspoons cumin

2 canned chipotle peppers, drained and chopped

1 28 oz can crushed tomatoes

3 cups water

2 Russet potatoes, cut into 3/4-inch dice (The original recipes call for four potatoes, but I couldn’t fit them all in, even in my biggest stockpot.)

2 carrots, peeled, cut into 3/4-inch dice

1 cup corn (About an ear or two if you don’t use the bagged or canned variety.)

1 16 oz can black beans, drained and rinsed

1 cup fresh cilantro, lightly packed, torn into pieces

1 lime, juice and zest (If you don’t have a zester, don’t worry about it. Also good on you, zesters are usless unitaskers. Use a microplane grater instead.)

Salt and pepper

20150104_153208

OK, let’s get started by chopping up our onion, carrots, and garlic. Line up your victims on the cutting board.

20150104_160103

Now, grab your knife and start slicing. I assume you know how to cut stuff, so how about a brief sidebar in the mean time? But make sure to keep an eye on what you’re cutting as you read:

A Meditation on Knives

I always see these fancy-prancy knife sets that have too many pieces. Seriously, 14 piece knife set? Who needs 14 pieces? (To be fair, 2 of those are kitchen shears and a knife sharpener, both of which are useful but not knives.) As long as I can remember, I’ve been using a chef’s knife to do my chopping, cutting, cleaving, and everything in between.

kitchen-classics-chefs-knife-59kcz-full-1

Chef’s knives are general-purpose knives, used for cutting vegetables and meat. The above picture is a French-style chef’s knife, which is the one I’m used to. The German-style chef’s knife is rounder towards the tip.

Cutting vegetables? But I can cut vegetables just fine with a vegetable parer.

You can, but you could also cut vegetables with a machete, paper cutter, or piano wire, and it doesn’t make it optimal. See, my problem with those tiny little knives is although they’re good for fine detail, they don’t have the oomph to make broad cuts across tougher vegetables like carrots, onions, and potatoes (coincidence?) like a chef’s knife. Also, if you want fine detail, you can carefully use the tip for cutting matchstick pieces, or julienne.

OK, but the knife you’re using looks different.

That’s because it is different. The knife I now use is the Japanese-style santoku.

santoku

I started using these a couple of years ago and they’ve pretty much replaced chef’s knives for me. My santoku knife tends to be a bit heavier than the chef’s knifes I’ve used, which makes it easier for trimming and cutting meats. Plus the knife has a Granton edge, which allows for small air pockets when slicing through foods, so they can’t stick as easily.

Sounds like a Santoku is everything I need.

Not quite. Santokus are still no replacement for serrated knives, which excel at cutting things with a firm exterior but soft center (think tomatoes and bread.) In terms of serrated knives, I keep an all-purpose, medium-sized serrated knife instead of a bread knife and smaller serrated knife.

In the time it took me to explain all that, this is what the vegetables should look like:

20150104_162211

20150104_162207

20150104_185645

OK, now let’s turn to the chipotles. You can just chop them up like you did everything else, but let’s go the extra mile with these.

20150104_185840

Go ahead and seed the chipotles. I find the best way to seed pre-canned peppers like these is to gently cut them open and rinse out the center under the faucet, which easily removes these bad boys.

20150104_190621

OK, rinse them (and your fingers) real well and put them to the side. If you don’t, you’ll be sorry the minute your eye itches. Now is the time to get started with the vegetables. In a stockpot or Dutch oven, saute the onions for 5 minutes, until they start to caramelize. While that’s happening, use this time to dice the potatoes.

20150104_185303

You’ll notice that I didn’t cut the potatoes earlier with all the other vegetables. The problem is that potatoes brown quickly when exposed to air, so I saved it for until right before they go in. If you need to prep them ahead of time, you can also sprinkle some lemon juice onto the cut spuds to keep them fresh. After you’re done with that, add the cumin, garlic, salt, and pepper to the stockpot.

20150104_190413

Great! Let that sit for a minute or so, to let the garlic soften. If a little onion burns and sticks to the bottom, it’s all right. But not too much! Now, add the tomatoes, chipotles, and water. If you want to make a heartier stew, use vegetable stock instead of water.

20150104_191502(0)

Stir up the onions and garlic into the liquid mix and then add the potatoes and carrots. and bring to a boil. Once it’s going, reduce the heat and simmer the pot for 20 minutes. You can now use this time to clean up and reflect on the physical and ethical ramifications of a vegan diet.

20150104_193128

Or you can cook up a whole bunch of bacon. Yes, I know I said this was a vegan recipe at the beginning, and it still is! But a little crispy bacon as a finisher really adds to the dimensions of this dish. Mainly the meat dimensions. I cooked up the bacon on the side since we were eating in mixed company and all that.

20150104_193635

Yum yum. I regret nothing. If it’s been 20 minutes, go ahead and add the corn and beans in. It’s possible that some evaporation occurred during simmering, so feel free to add some more liquid (water, vegetable stock, vodka) to adjust the consistency to your liking.

20150104_195834

Aw snap, looks and smells great! Note to self – use a larger stockpot next time. Luckily nothing spilled. OK, now for the finisher. Coarsely chop the cilantro and add it to the pot, along with the lime juice and zest. Cilantro has enough structure to it that you shouldn’t need to chiffonadebut feel free to roll one up if you want to. You won’t need to pull out any stems here!

20150104_200317

Great. Throw it all in the pot (except the lime skins!) and let the pot simmer/rest for at least 10 minutes. The more time you give it, the more cilantro and lime flavor can soak into the stew. But if you’re hungry now, I won’t blame you.

20150104_201055

Look at that! Perfect! Serve this stew piping hot, with a little leftover chopped cilantro and crusty bread if you have it. (And the bacon for the non-vegans.) In terms of vegan recipes, this one really stole my heart due to its flavorfulness and ease of preparation. Well played, veganism. You may have won this battle, but not the war. Try it out and decide for yourself!

Slow Your Roll: Chicken Tikka Masala Edition

I’d like to introduce you all to a special friend of mine. Normally we’re all rushing through life, doing things as quickly as possible, but this recipe calls for something a little…slower.

20141208_104703

I’ve had this slow cooker (otherwise known as a Crock-Pot) for about a year now. My parents gave it to me as a housewarming gift and quite frankly it’s one of my favorite kitchen tools. What better way to cook a nice meal ahead of time than dumping everything into a pot and pressing “Start”? That way, you can get on with your busy life. I know a lot of people think of slow cookers as a weird vestige of times past when white people ate things like “casserole” and vegetables suspended in Jello on the reg, but the slow cooker can cook a wide variety of dishes. It can even be used to steam vegetables and cook pasta! But where a slow cooker really shines is in its ability to turn tough cuts of meat into something wonderful. See, the problem with buying cheap meat at the grocery store is that it’s full of connective tissue and fat. Pan fry a cut of it, and you’d end up with some half-burnt, half-raw mess. However, if you pop that cut into a slow cooker, the tendons and fat will melt right off without the meat burning. You can then either dispose of the fat or make into pan drippings sauce, and you’re left with a nice tender cut that will fall apart with the blunt side of a fork. The only caveats to a slow cooker is that they have to have a lot of liquid to evenly distribute heat and you have to be careful about what goes in when. Hearty vegetables like carrots and onions do well, but if you put in a can of beans you’ll be skimming off bean-scented starch water eight hours later. The other nice thing about slow cookers is that it’s really hard to burn things in them. I’m not saying it’s impossible, but I haven’t done it yet. Anyway, that’s enough about slow cookers. If I’ve so swayed you into buying one, the Hamilton Beach I own is pretty good and it has a fancy electronic interface that make it look like you’re tickling a robot when you use it. Note: I do not get any money from you clicking on that.

What better way to introduce the slow cooker than by cooking something totally non-traditional in it? Something ethnic and using a lean cut of meat? Something like… chicken tikka masala? As a brown dude, I have been to a ton of Indian restaurants and chicken tikka masala is like the only thing I get, besides garlic naan. Something about its smooth, tomato-y taste makes it non-intimidating. I guess that’s why it’s the national dish of Britain! Chicken tikka masala is traditionally cooked in a tandoori oven, which is a fancy heat-retaining clay thing. The slow cooker uses a nice, long, slow cooking time to emulate the tandoori cooking style which quickly tenderizes the chicken. I’m super glad I found this recipe before I bought that tandoori oven on Craiglist! Speaking of, this recipe comes to us from Cooking Classy, by way of the Huffington Post, which I got linked to from my Facebook. Thank you, Internet content-aggregators!

Chicken Tikka Masala

5 or 6 boneless, skinless chicken breasts

1 large yellow onion

4-5 cloves garlic (I know I usually sling around garlic like it’s vampire weekend, but I was trying a new recipe.)

2 Tbsp freshly, finely grated ginger

1 29 oz can tomato puree (28 oz is fine too if your store does not have Contadina brand.)

1 1/2 cups plain yogurt

2 Tbsp extra virgin olive oil

2 Tbsp lemon juice

2 Tbsp garam masala

1 Tbsp cumin

1/2 Tbsp paprika (Or more! Read on to find out what I mean.)

2 tsp salt, or to taste

3/4 tsp cinnamon

3/4 tsp freshly ground black pepper

0-3 tsp cayenne pepper*

3-4 bay leaves

1 cup heavy cream

1/2 tbsp cornstarch

*If you’ve got people sensitive to heat in your audience (or “spice babies”, as I like to call them) you can cut out the cayenne pepper. I used half a teaspoon and my spice baby didn’t complain.

20141208_105704

The crazy thing is, I just opened my grocery bag and everything came out like that. It was nice of Star Market to put a knife and cutting board in there. Also, check out those spices in the upper right hand corner! This thing is gonna be flavorful. OK, now that you’ve laid everything out nicely, put the heavy cream back in the fridge. This is a slow cooker recipe, you don’t want your cream sitting out for eight hours.

20141208_105740

La la la. OK, let’s start by getting a big metal mixing bowl out, like the kind you use for mixing cookie dough. We’re going to use the mixing bowl to mix our ingredients for the masala sauce! Bet you figured this one out before the end of that sentence! Top Chef, here we come! Now that you’ve got something to mix with, it’s time to prep the vegetables. Start with the garlic. Now, I’m about to do something I (almost) never do. Take a look:

20141208_110731

That’s right, it’s a garlic press. I’ve got beef with garlic presses because they ruin the nice texture of garlic. Using a knife, you can carve the cloves into neat slices or small chunks or even mince them into, well mince. But a garlic press extrudes the garlic into a weird, soft paste. And then a bunch gets stuck on the inside. Worse, it’s a unitasker, and Lord knows my spirit animal Alton Brown would have something to say on that issue. However, when I’m making something with garlic that’s supposed to have a smooth mouthfeel, I will begrudgingly use a garlic press. It’s like when Spider-Man teams up with Dr. Doom to fight Skeletor, I’m doing it for the greater good.

20141208_111142

Oh god, how can I live with myself after what I’ve done? By chopping onion, of course. You’re gonna want to go for small, thin strips here, so cut into half moon slice, then make a few sagittal cuts along the whole thing. It should look like this, I guess:

20141208_111135

Add that to the bowl and then grab the ginger. We’re fortunate enough to have a zester which is basically a really fine grater. If you don’t have a zester, use a really fine grater. You don’t need to peel the ginger, the papery skin is low enough in volume compared to the ginger that you won’t even notice.

20141208_112027

Make sure you don’t grate your knuckles. Right around now is when I got tired from all that prep work (I guess you could say it was really GRATING) so I made myself a drink. My coworker Emily told me about this one. It’s two shots of tequila mixed with Newman’s Own Limeade. She called it a ghetto-rita, so I will call it that too.

20141208_111712


Yum yum. Back to work! Pour the tomato puree into the mixing bowl, all over the garlic, ginger, and onions. You may want to get a mixing tool at this juncture. I used a rubber scraper, so I could scrape down the sides of the mixing bowl. OK, now measure out the yogurt.

20141208_112413

Apparently yogurt only comes in either the single-serving or Costco sized containers, so now I have a bunch of leftover yogurt that I’m never gonna eat because there’s no fruit at the bottom! I looked really hard, too. I guess I can always make more chicken tikka masala. Add the yogurt to the mixing bowl. Then add in the olive oil, lemon juice, and spices.

20141208_113007

I hope your bowl is bigger than mine, it was a real bear to stir this all up without spilling it. Speaking of which, stir it! Don’t worry if it looks a bit thick, people said that about me all the time and I turned out fine. Pour half of the sauce mixture into the slow cooker and set aside. Now use your cutting board to cut up the chicken breasts into little bite-sized cubes. They should be around 1 inch or whatever you feel comfortable fitting in your mouth all at once. Throw the chicken in the slow cooker once it’s all cut up-

20141208_114456

and then add the rest of the sauce. Don’t forget the bay leaves!

20141208_114630

You should always count how many bay leaves you put into a dish so you can take them all out later. Trust me, trying to digest a bay leaf is not fun. OK, now for the slow part. Cover and set your cooker on LOW for eight hours. That’s right, eight. (Or HIGH for four hours, if you’re living life in the medium-fast lane.) I did this recipe on my day off, so it gave me time to catch up on work emails and play Far Cry 4. Good use of my time, I’d say.

Eight hours later…

Remember that heavy cream from earlier? If you didn’t forget it on the counter (and thus have to go buy more), get it back out of the fridge and pour out 1 cup into a measuring glass. Then, add your cornstarch to the cream. Cornstarch is a great way to thicken up sauces without using flour, which usually adds a flour-y taste. However, DO NOT add cornstarch directly to hot liquid. It will get all clumpy, and nobody wants that. Whisk together the cornstarch and cream, then pour it on into the slow cooker. At this time, I also added a bit more paprika, just to add color. If you see it prudent, you can do so as well.

20141208_193208

Great. Stir it in, and let it sit for about 20 more minutes. I used this time to cook up a ton of rice, because I had been playing video games for about four hours straight and things were getting weird in my brain. Once the rice is ready, turn back to your slow cooker. Taste the masala. Let its warmth flow through you, mouth to toes. Recognize the cumin notes poking through the velvety blanket of tomato. And also add salt, if your dish needs it. Protip: always taste a dish a minute after salting, as that gives the salt time to mix in and draw out flavor from the key players.

Remove the bay leaves and stick a fork in it, this thing is done like dinner! (Don’t actually stick a fork in it.)

20141208_195146

Mmm, warm, hearty, and delicious. Georgiy said that this is the best thing that I’ve ever cooked, and I know it’s not the influence of Big Rice biasing his answer, so I will chalk this one up as a success.


Spilling the Beans (Onto Some Rice)

I’ve had a hankering for good ol’ Louisiana food ever since I got back from New Orleans. I had some boudin when I was in Texas but that didn’t quite cut it . So, after trolling the web for some recipes, I decided that red beans and rice was the way to go, mainly because I didn’t have it in me to cook crawdads. Red beans and rice is a staple dish of Creole cuisine, one of the two main culinary styles of Louisiana. The other is Cajun style. 

What’s the difference between Creole and Cajun cuisine?

Good question! Cajun comes from “les Acadians”, the original settlers who came over from France and settled in the Acadia region of Canada (now the modern Maritime provinces). The Acadians were kicked out by the British in the 1700s, and they made their way down south to Louisiana, specifically the region of Acadiana.

Creole refers to the population born of colonial French settlers who came to Louisiana. It used to be used only for the upper-class French and Spanish citizens, but then extended to the children of slaves as well as free-born citizens.

That’s great, but it doesn’t explain the difference between Creole and Cajun cuisine.

Cajun cuisine was influenced by the local area of Louisiana that the former Acadians had settled. The swamps, bayous, and prairies presented new kinds of meat and fish to kill and eat. Cajun cuisine also tends to use all parts of an animal, since if you had to journey from Nova Scotia to New Orleans, you’d probably learn to be resourceful with your food too. Cracklings (small fried chunks of pork and skin) is a good example of Cajun ingenuity. A common misbelief is that Cajun food is spicy. Sure, it’s got a kick to it, but I would definitely say that Cajun food is more hearty with a little heat in it, than flat out spicy.

Creole food, however, was partially a result of African-born slaves cooking in the homes of the rich. With access to an exotic variety of food and spices and a lot of time to experiment, cooks were able to combine the knowledge of of their home cuisines (African, Spanish, Carribean, Portuguese and others) with the local ingredients to make snazzy new dishes. Jambalaya was invented by the Spanish living in New Orleans. Wanting to make paella, they didn’t have easy access to saffron where they were, so they substituted tomatoes. The rest, as they say, is history.

OK, so how can I tell if what I’m eating is Creole or Cajun food?

The easiest way to tell the difference between the two is if there’s tomatoes in the dish. Tomatoes are almost exclusive to Creole dishes, which is a result of its Spanish, Portuguese and Italian heritage.

But honestly, why bother? Creole and Cajun food have grown up along side each other and shared so many elements there’s no simple and easy distinction. Étouffée and gumbo are found in both Cajun and Creole cooking, with shared elements of both styles’ cultures. But don’t take my word for it, you can find out all this and more from your local library. Or here.

Let’s get started. This recipe was adapted from the New Orleans style Red Beans and Rice recipe on Goons with Spoons, the Something Awful cooking wiki. I like to say “adapted” because it sounds better than “didn’t have all the ingredients.”

Red Beans and Rice

1 lb. dried red beans

1 lb. smoked sausage (I used linguiça because the grocery store didn’t have Andouille. If they have Andouille, get Andouille.)

1 onion

4 stalks of celery

1 green bell pepper

Chicken broth (at least 32 oz., 48 oz. recommended.)

Bay leaves (2-3 will do.)

Dried thyme

Bacon! (Not necessary but a nice addition.)

1 garlic (I’m saying that because you can really use however much you want as long as it’s more than two cloves. Guess how much garlic I used? Go on, guess. I promise I’ll tell later on.)

OK, start by getting the gang together.

ingredients

Wait, actually, scratch that. The first thing you should do is soak your beans. If you noticed, there’s no beans in the above picture. That’s because I had already soaked them. Get the dried beans out and dump them into a colander over the sink. This lets you shake out any sand, pebbles, or diamonds that may have accidentally been bagged up with the beans. Once you’ve done that, put them into a big pot and cover them with about 4 times as much water. I think I used about 5 cups of water for the 1 pound of beans.

driedbeans

You should leave them soaking overnight. If you’re in a hurry (if so, shame on you for not reading all the way through first), you can manage by soaking the beans for 4-6 hours in hot water and then cooking the whole thing for a bit longer.

The next day…

soakedbeans

Ooh! Nice plump beans! Drain the beans and let them sit in the sink while you put the pot back on the burner. I hope you got a big pot. Next, grab a knife and chop your sausage up. I chopped these sausages on the biaswhich gives a larger surface area per slice. This lets you soften/caramelize/cook your vegetables/meats faster.

bias

Oh yeah, if you have bacon, cut that up into slices as well. You don’t need to cut them on the bias, just into little bite-sized pieces. Once you have your cut meat in front of you, heat up a little oil in a pot over medium heat. Use just a little oil because the bacon will pump out more than enough fat to cover everything. Then dump in the pieces.

frying

Good, good. Give it about seven minutes or more to cook, until the bacon and sausage is all crisped up and popping with fat. Make sure to stir the mix every so often, because bacon will stick to the bottom. But that just adds nice smoky flavor to the final product, so it’s not the end of the world if a little bit starts burning. Trust me on this.

crispy

Yum, crispy delight! OK, turn to the veggies. We’re going to dice up the onion, bell pepper, and celery now, otherwise known as the holy trinity of Cajun/Creole cuisine. The holy trinity is based on the culinary base of mirepoix in French cooking, which uses onion, celery and carrots. These aromatic vegetables are the base of many stews, soups, sauces, and other kitchen things beginning with an S. Similar bases exist as the Spanish sofrito (onion, pepper, and garlic) and the Chinese yuxiang (garlic, ginger, and scallions). Go ahead and chop now.

holytrinity

All right, your pot should be greasy enough from frying up the meat. If it’s not, toss a little more oil. Then heat it over medium-high heat and sauté the vegetables for about six to eight minutes, until the onions are sweating. OK, now is the time to find out how much garlic I used. Are you ready? I used a WHOLE

GODDAMN.

HEAD.

headexplode

Yeah buddy. Toss in however much garlic you’re using now. Dare ya to use two heads!

veggies

The garlic will be aromatized after around two minutes. Once that’s done, add the sausage and bacon back into the pot. Now it’s time to add the cooking liquid! Toss in the two cans of stock. Additionally, a little alcohol is good to add to the liquid. I usually pour in some of whatever I’m drinking.

flask

Oh, maybe not. If you’re not knocking back the hard stuff, some beer would be good. I checked out what we had in the beer fridge.

guinness

Try not to go for the lighter lagers, a brown ale would be good. This is what I had on short notice. All right, add that to the chicken stock in the pot. You want your liquid to cover the ingredients, so don’t be afraid to add more than two cans. Also, add the seasonings at this time. Use some salt, pepper, a couple of shakes of thyme, and the bay leaves. Make sure to count how many leaves you put in, we’ll be pulling them out later.

simmer

Stir at all up, and then simmer it for four hours. What? You don’t have that kind of time? Well, put it over medium-low heat and stir it every so often. It should be done in about two hours that way. You can also make your rice during this time. If you don’t remember how to make rice, please see my earlier blog post.

Two hours later…

I know, I’m a hypocrite. So sue me. The beans and vegetables should have soaked up most of the liquid, giving you a nice chunky consistency. But we want to go smoother than that, yeah? So, pull out your trusty blender.

blender

Yeah, that’s a mason jar on top. Did you know the standard size mason jar will fit most blender threading? No need to wash out the big container for small amounts. Life = hacked. Anyway, blend up a jar’s worth of the beans and add it back into the pot. Don’t forget to remove the bay leaves first! If you don’t have a blender handy, you could use a wooden spoon and mush it all up against the side of the pot. It should look like this after mushing it up.

cooked

It’s ready to be served! (Or you’re ready to cook some rice, if you forgot earlier.) Spoon the mix over some rice and serve with hot sauce on the side.


~HONESTY TIME~


To be honest, this recipe didn’t come out as great as I thought. Don’t get me wrong, it was still smoky and hearty and delicious, but the consistency was off. That’s why I recommended adding in a third can of chicken stock when it comes time to add liquids. You can always boil off excess liquid with more time, but I committed the cardinal sin of not devoting enough time to a recipe. Oh well, at least I learned from my mistakes and I can pass that knowledge onto others. Don’t end up like me, whatever you do!

done

Pictured: the results of a lifetime of lies and regrets.


Lovin’ Fries

~Welcome back~

I’m sorry I haven’t updated in a while but I was officiating a skateboarding competition in San Antonio. That, coupled with planning a Halloween costume and party = no new posts 😦 However, this time off from my blog allowed me to expand my world view, below which I’ve summarized.

1. Texas’s streets are really wide, making them hard to jaywalk. This was frustrating to me, being from the Northeast.

2. TEXAS is an anagram of TAXES.

Anyway, I decided to ease back into the cooking blog game slowly, making hamburgers and oven fries last night. Why didn’t I make a post about hamburgers, you ask? I figured everyone pretty much is set in their own ways for making hamburgers. People get really defensive about using this meat or that cheese or however much heat or something. Best not to try to go against someone else’s grain. Also I need to have something for next month. This recipe was adapted from Recipes for a Lady or Man by Chris Onstad, who also writes this pretty good webcomic. The best recipes I know come from talking cats.

Oven Fries

6 russet potatoes

Olive oil

Salt

Pepper

Preheat your oven to 450F.

Start by washing your potatoes. I shouldn’t have to tell you that, right? If there’s dirt on any of your vegetables, you should wash them on principle. But if anybody does have a recipe that doesn’t involve washing the dirt off potatoes, send it to me. I’d be interesting in reading it.

potatoes

OK, now that you’ve got your taters nice and clean, slice them into into triangles by cutting them into halves, quarters, and then eighths. Don’t worry if they’re not perfect, few things in life are. Then put them on a foil-lined baking sheet.

cut and arranged

Lovely, lovely. Don’t stack them all close together, give them room to breath. Now, brush them with olive oil. This is about when I found out we lost our pastry brush. If you don’t have one, you can use a rubber scraper to add oil to both sides. I would have taken a picture here but it’s kind of hard to show the sheen of oil on the potatoes. Also add salt and pepper, too. I knew there was a reason I listed those ingredients. Hopefully by now your oven is heated through (to 450F, if you forgot). Stick them in there for 20 minutes.

time

Yeah, that’s right, I take my photos in real time.

20 minutes later…

Take them out and flip all off the taters onto their sides. I like to take the rubber scraper and go down the line, knocking them over like dominos.

flipped

Nice. Here’s where I differ from the original recipe. Onstad says to turn up the oven to 500, then brush the slices with oil and bake them again. The two different cooking temperatures should quickly crisp up the skin while leaving the insides fluffy. However, I rarely do that, usually because I forget to turn up the oven. What you can do is leave the oven at 450F, then brush them and put them back in for 20-25 minutes. Mmhmm, bear with me. After this time, they still should be nice and crispy. Tap them with a knife, you should feel a nice knockback from the skin.

This is my favorite part. Tip them all into a metal bowl, add a little salt-n-pepa and olive oil, and then shake it up. Don’t forget to cover the bowl with something! Otherwise you’ll have delicious fries everywhere, and not in the fun way.

I like this recipe because you usually have all the ingredients around whenever you’re cooking something hearty. Plus, good oven fries usually impress people. The thickness of these fries makes them ideal for serving with chili, as well. Serve with ketchup, barbecue sauce, or your favorite fry dressing.

done

See you next time, where I do something completely different.

Peppers N’ Stuff

I had an interesting Labor Day weekend, I was up in Andover for my friend Shawna’s birthday party (happy birthday Shawna!), then ended up hosting a Sunday night party for my friend Anya (welcome back Anya!) So after spending a lovely afternoon with Natasha in the Arnold Arboretum, I made a last-minute decision to cook these before the party. What I like about stuffed peppers is that they look fancy, but they’re really not. I first made these when I was studying abroad in Spain, because I had limited access to ingredients (that I could pronounce). The mix should take twenty minutes to prepare and they bake for around half an hour, so they’re good for quick dinners. Especially if you have a sous chef, which I did not. Everyone else was gone until half an hour after the party started.

Stuffed Peppers

6 large bell peppers, (red or green)

1 lb ground beef/ground sausage (I used a mix of both!)

1 medium onion, diced

1 cup of sliced mushrooms

Garlic, minced (how many cloves? As many as you want, at least 3) 

2 cups cooked rice (I used jasmine, any medium or long grain rice will do)

1 14 oz. can of tomatoes, drained

1 small bell pepper, seeded and diced (this is in addition to the other 6 peppers, use a different color for contrast) 

2 tablespoons tomato paste

1/2 cup Parmesan cheese (and extra to sprinkle on afterward)

6 slices Provolone cheese

It should look exactly like this, if you have the same kitchen as me.

ingredients

Start by cutting the tops off of the bell peppers and seeding them. Make sure to get all the seeds out by giving the inside a quick rinse off. Then level off the bottoms of the peppers so they stand up straight on the cutting board. Don’t worry if you cut into the bottom a little, the mix will stay in. Wait, preheat the oven to 350F. I always forget to do that.

peppers

OK, now wrap each pepper in foil and stick them all on a cookie sheet. Then put them in the oven for 15 minutes. While these are baking, heat a little oil (olive, maybe) over medium heat and brown the ground meat. It should take around 7-9 minutes, depending on the heat level. 

meat

Drain the meat off and put it aside. Add the peppers and onions and saute them until soft, around 7 minutes. There’s no need to add any additional oil, the pan should be greasy enough from the meat. However, if you find the onions are sticking and burning, go ahead and throw some oil on there. Sauteing is usually done with high heat and smoking oil, and this is good if you like your vegetables on the rarer side. But we’re going for loving caramelization here, give it time. If you’ve got a cover, lower the heat to medium-low and throw it on. This will steam the veggies, softening them up just the way you want it.

peppasandonions

Oh yeah, check that out. Now would be a good time to put in the ‘shrooms. You don’t need to rinse them, unless they’re absolutely covered in dirt. Cook the mix until the mushrooms are brown (apart from the dirt on them.)

mushies

All right. toss in the garlic now. Why not earlier? Garlic has a really high surface area:volume ratio, so it burns quickly. It’s the same reason why sawdust burns up in a flash, much faster than a log does. Garlic really only needs about 2 minutes for the oils in it to bloom, so don’t be hasty and sneak it in with the peppers and onions. 

mix

Now that the veggies are done, add the meat and cooked rice to the pot. Oh, you forgot to cook the rice? That’s ok, just do it now. You do know how to cook rice, right? 

How to Cook Rice (please skip this if you know how to Cook Rice)

A lot of people I know are scared of cooking rice. (My roommate Georgiy is scared of rice in general, so at least you’ve got that on him.) I know, I know. Rice can be tricky to figure out the correct proportions. Luckily I’ve got some tips for you!

1. The correct proportion of rice to water is zero.

That is to say, don’t use water. Instead, use chicken stock! It makes the rice heartier and more flavorful, especially in a recipe like this. Vegetarian? I’d rather you didn’t, but go ahead and use vegetable stock. Either way, eschew the H20. 

2. Use chicken stock in a 2:1 ratio with the rice. Cooked rice is 2:1 with dry rice.

So, if you’re making 2 cups cooked rice, put 1 cup of dry rice in the pot with 2 cups of chicken stock. 2 cups uses 4 cups of stock, 3 cups uses 6 cups, and so on. However, there are two points to consider here: certain types of rice fluff up more while cooking than others, and that this doesn’t work with larger quantities of rice. You can already tell that this was getting ridiculous with the 6 cups of stock thing. Use a rice cooker if you’re making industrial quantities of rice. 

3. Another way of measuring liquid is the first knuckle method.

I like this trick better because it doesn’t involve math. Start by putting your uncooked rice in the vessel you’ll cook it in, then stick your index finger on the surface of the rice, straight up and down. Make sure to level off the rice as much as possible. Then, fill the pot with stock until it reaches the first knuckle on your finger. Bam, it’s that easy. 

4. Butter it up.

Put a dollop of butter in with the liquid and stir it all around. This coats the individual rice grains so they won’t stick to the bottom. It also makes the rice taste great. Go ahead and use olive oil instead of butter, iffin’ you’re so inclined.

5. Low heat and don’t peek!

Cover the pot and set the rice on low heat for about 10-15 minutes (for this quantity of rice, at least.) Don’t be tempted into looking into the pot, you’ll need the cover to trap all that valuable steam. The rice is still there, trust me. Once it’s done, fluff it up with a fork to get all the heat at the bottom mixed in. 

rice

That’s it, really. You’ll notice I didn’t add any salt to the rice. I don’t like adding salt to a lot of things when I cook. My motto is “Do it yourself, dammit”. But if you have to, a quarter teaspoon should be more than enough. 

OK, now that you have some cooked rice in front of you, add it to the vegetable and beef mixture. Add the canned tomatoes and tomato paste, then stir it all together so it’s incorporated. Watch out, the tomatoes may squirt if you bust them open while stirring. Grind some fresh cracked black pepper into it, and add some salt here too, but not too much. Remember that salt takes a little while to draw out flavors when you add it to a dish, so taste food at least one minute after salting it. 

themix

Looks good enough to eat! In fact, it is, and you can. How do you think I started making stuffed peppers? By shoveling my vegetable stir fry leftovers into a bigger vegetable. Speaking of shoveling, you should stuff your peppers now. Sprinkle the Parmesan cheese in layers as you stuff the peppers. It may help to use a spoon to get the mix packed in there. Don’t forget to put extra cheese on top!

stuffed

Now for my favorite part, put the Provolone on top. No such thing as too much cheese, yeah?

beforeoven

Bake these bad boys for about 15 minutes, at 350F (hopefully you didn’t turn the oven off). I like my peppers on the rawer side, so they’re in the oven for a shorter time. if you want tenderer peppers, bake them for longer, both initially and now. Once the peppers have spent enough time thinking about what they did, pull them out and admire.

outoftheoven

Yowza, looks good! Sprinkle some more cheese on if you please, and take them out to the table where your ravenous dinner gue-

emptytable

Oh yeah, I forgot. Well, screw that, leave it on top of the stove to get cold while you clean up. Now would be a good time to take a picture for your cooking blog, if you have one. Each pepper turned out to be 2 servings, so you could cut them in half now if you wanted. If you do, melt some more cheese on the cut side. Mmm.

This looks great, but how can I modify this recipe?

There’s a million other things you can add, or subtract for that matter. In addition to removing the beef and substituting vegetable stock for a vegetarian dish, you could add black beans for the missing protein. Want to go greener? Spinach or another rough, leafy green can be stirred into the mix before stuffing. Root vegetables like zucchini and squash shine here, too. Make sure to cook these for a while so they’re not tough when you’re biting into it. If you want to get crazy, cut the peppers in half and add some panko on top before baking. Really, you can put anything you like into a stuffed pepper, that’s the beauty of them.

coverphoto


Pictured: the beauty of a stuffed pepper. 


Seasoning’s Greetings: Yes We Pan

Recent events have caused my beloved cast iron pan to fall into a state of ruin. Apparently one of my roommates had committed the grave error of not re-surfacing the seasoning after he scrubbed it off with salt and vinegar and boiling water. The seasoning on a cast iron pan is very important, as it protects the iron and makes a non-stick cooking surface. Here, check out the damage: 

dirty

Yeesh, doesn’t look too hot. But don’t despair, this mess can be fixed by reseasoning the pan. Reseasoning cast iron is one of my favorite pastimes, mainly because every time you cook on it, you are reseasoning it (Reason #17 why cast iron rules.) Once you have a good base layer on, pretty much any oily food will add to the seasoning. Unfortunately, your lovely seasoning layer can be ruined for a number of reasons, like abrasive cooking tools, acidic foods like tomatoes, or well-meaning roommates who let a cast iron pan soak. 

 When I first got my pan, I looked up the best way to give it its first layer of seasoning. I found about thirty different blogs all claiming the best way to do it, including one that used long and fancy words like “electrolysis” and “lye”. Seriously, electrolysis to strip off rust and old seasoning? People have been cooking with cast iron for centuries, don’t overthink it. What all these blogs had in common is that you really only need two things to season a pan – oil and heat. 

The basic science behind seasoning a pan is that combusting an oil causes release of free radicals. Think of free radicals as compulsive kleptomaniacs. They’re missing an electron, making them unstable, and they won’t feel complete until they steal one. So, they break in next door and steal an electron from neighboring oxygen molecules, damaging their integrity of and turning them into free radicals, causing a chain reaction. (Wait, kleptomania isn’t contagious. End of analogy.) This oxidization is how free radicals damage cells and cause aging. Reactive oxygen molecules are like your neighbors who leave the door unlocked with all their electrons in plain sight. Those antioxidants that I keep hearing so much about these days are molecules with electrons to spare without becoming destabilized themselves. Free radicals will pick up the antioxidant’s electrons and become stable without damaging other molecules, like leaving a bowl with free stuff outside to placate your kleptomaniac neighbors. (OK, end of analogy for real.)

In addition to messing up your body, the formation of free radicals in oil causes chain reaction polymerization, where the oil’s molecules cross-link and harden, forming a nice smooth surface across the pan’s bottom. 

Wouldn’t the free radicals be bad for you? 

Only if you’re eating the pan. By the time the pan comes out, all the free radicals will have been turned into polymers.  The most free radicals are formed at an oil’s smoke point. Isn’t it funny? Free radicals, which we normally abhor, transform into smooth, non-stick cooking surfaces! Thanks, free radicals!

radical_gif-3839

So how do I season/reseason a cast iron pan?

Start by preheating the oven to as hot as it can go. 400-500 degrees is fine. Since it’s so hot in here, make yourself a drink to cool off. I chose the essential cooler, a cranberry and vodka (Cape Codder for you fancy folks) served in a beach glass.

drinks

If you’re seasoning a pan from jump, you’ll need to scrub off the protective layer that came with the pan from the factory. This is probably the first and last time you’ll use soap on it. For reseasoning, just make sure any crap stuck on the pan is cleaned off. Use some hot water, a stiff nylon brush or steel wool. Afterwards, stick the pan on a burner on medium-low heat for about 10 minutes to dry the pan, inside and out. Any water residue in the pan will prevent even coating because the oil, being non-polar, won’t flow into water spots. If you have rust, you can scrape it off with kosher salt and steel wool. Serious damage can be burned off by throwing it a fire (though I don’t speak from experience.)

Once the pan has cooled, grab some olive oil and rub it into the pan. Olive oil is good because everyone has it, and it has a low smoke point.

oilingup

Why You’re Wrong About…Olive Oil

Some people say don’t use olive oil for sauteing because of its low smoke point. Some people are also wrong. Here’s why:

1. Olive oil makes vegetables taste great.

2. It’s low in saturated fats, high in monounsaturated fats.

3. Most gas burners only get to around 350-400 degrees at medium-high heat, just below the smoke point of EVOO*.

4. If you’re sauteing in a pan full of heavily smoking olive oil, you did something wrong, and it wasn’t the choice of oil.

*I apologize for using a Rachael Ray acronym. It’s the last time, I promise.

Anyway, make sure to cover all sides of the pan. Don’t forget the back too! 

back

Don’t be shy with the oil, but make sure to buff it in with paper towels. The pan should have a thin layer all over, but not overly sticky and no goopy spots. Once you’ve done that, wash your hands and cover a cookie sheet with aluminum foil. You’ll thank me later, trust me. By now, your oven should be preheated (I chose 450 degrees this time.) The pan looks much better now, but we need to form our free radicals! Also, unplug your smoke alarm and open a window. It’s gonna get Cheech and Chong up in this piece.

intheoven

Stick the pan and the cookie sheet in the oven and set the timer for an hour and a half. This gives you enough time to watch David Lynch’s 1977 classic Eraserhead, with a minute to reflect on what you just saw. I chose to mop the kitchen floor instead.

Animated_clock

After an hour, (what did I say? The timing doesn’t have to be exactly that, but the longer the better and the pan should bake for at least half an hour) turn off the oven but keep the door closed. Leave the pan there for about two more hours while you fix yourself another drink. This is important. (Not the drink part, the waiting part.) Iron is a poor conductor but has a lot of thermal energy. This means that it heats up and cools down slowly. I turned my oven off at 9 and grabbed it at 11, and it was still warm to the touch. Don’t be a fool.

Once the pan is cool and your hangover is kicking in, take it out and admire your handiwork.

clean

Voila! Looks nice, doesn’t it? If there’s thick spots or the pan is sticky, go ahead and repeat the process. This time, use more oil/higher heat. The seasoning on the pan will form in layers, so it’s better to go in for two rounds with less oil than one round with more. If your pan was rusty and you scrubbed it down to the gray iron layer, you’ll want to put more than one layer on it. 

This looks like a lot of work. Do I really have to do this?

Depends. If you inherited your cast iron pan, chances are it has a good layer of seasoning on it already. In this case, regular cooking of oily foods will add to the layers of seasoning. Lucky you!

For people with new pans, most come pre-seasoned. The one I own was pre-seasoned, but I decided to season it anyway. If you don’t want to go through the rigmarole, cooking a pack of bacon in your new pan and rubbing the fat into the still-warm pan will do wonders. If you don’t want to cook a pack of bacon in your pan, get out.

OK, I did it. And it looks great. How do I wash my pan without ruining the seasoning?

You don’t! After you cook something in it, throw out the leftover food bits and oil. Buff the greasy bottom with a paper towel until smooth. (Just like my weekend.) Cast iron doesn’t need to be washed unless there’s oil and food bits spattered all over.

There’s oil and food bits spattered all over.

You’ll need to clean it, then. Cast iron has an unorthodox but simple cleaning process. First, unlearn everything you’ve learned about cleaning pans. Cast iron should be cleaned promptly after cooking, while the pan is still warm but not hot. Run the pan under hot water, no soap. Use a nylon brush and kosher salt to clean off stuck food. Really stuck food can be scraped off with a bit of steel wool. Really, really stuck food can be removed by boiling a little water in the pan, then rinsing off the bits that come loose. Make sure to dry it well, as water + iron = rust. And then you’d have to start all over.

The two main directives of cleaning cast iron are don’t put it in the dishwasher and don’t put soap on it. (OK, you can use mild dish soap on it if you’re really paranoid. But cast iron heats to 400-500 degrees during cooking, pathogens die at 212. You do the math.) If you do use soap, don’t soak the pan. Use it as needed to get tough spots. If you season right, you”ll never have tough spots. 

So, do I have to do this every time?

No, the pictured steps are for restoring a base layer of seasoning, in case yours was destroyed by some chump. You can protect your pan by promptly cleaning it after each use, then rubbing a thin layer of oil in with a paper towel and gently heating it on low for about 5 minutes. Remember, oil = good! It keeps water off the iron so rust can’t form. Over time, you’ll get a cool jet black patina on the bottom that will keep your iron tough and foods from sticking. This is one pan that’s okay to put away greasy.

What’s this about not cooking tomatoes in the pan?

You should be careful about cooking tomatoes because they’re acidic. Here’s an experiment you can try at home. Put some ketchup on a plate and cover it with foil, making sure the foil is touching the ketchup, then stick it in the fridge. Tomorrow morning, you’ll have a fun surprise! Acid is pretty cool that way. It’s not the end of the world if you do make meat sauce or something like that in your pan, especially as you build a powerful seasoning layer. But early in your pan’s career, use discretion. 

Cast iron pans are very versatile, from sauteing vegetables to pan pizzas in the oven. You can even use it on your outdoor grill, or directly on a fire! Treat your cast iron well, and it will outlast you. Seriously, this pan will be at your funeral. 

(GIF credits: http://www.luvimages.com/image/radical_gif-3839.html, http://upload.wikimedia.org/wikipedia/commons/9/90/Animated_clock.gif)

Introduction: Cupcakes

So for a long time now, I’ve found one of the best ways to beat a hangover (in addition to water, ibuprofen, OJ, hair of the dog, grease, arcane incantations, stimulants, etc.) is to cook something. Why? I believe it has to do with the human brain only being to process so much information at once, gateway theory of pain, something like that. Also, food helps absorb the extra alcohol in your stomach (maybe?). I decided to do something different for this first post by baking: today’s recipe is Bananas Foster cupcakes. This recipe comes courtesy of Alyse Conn-Powers, originally hosted on her blog Drunk Cupcake Sunday which is unfortunately no longer active. Thanks Alyse!

Bananas Foster

  • 3 bananas, sliced
  • 2/3 cup brown sugar, packed
  • 1.5 stick of butter 
  • 1 teaspoon cinnamon
  • 1 teaspoon vanilla
  • 2 shots of dark rum (about 1/3 cup) NB: Clear rum is not an acceptable substitute here (or in life). 

Bananas Foster Cupcakes (makes 24 cupcakes)

  • 2.5 cups flour
  • 1 teaspoon baking soda
  • 1/4 teaspoon salt
  • 1.5 sticks of butter, softened
  • 1.5 cups sugar
  • 3 eggs
  • 1 teaspoon vanilla extract
  • 1 tablespoon dark rum
  • 3/4 cup sour cream

We start by getting all of our shit together, or mise en place. This is French for getting your shit together. Mise en place has its ups and downs, the upside of doing your mincing and measuring early is that you don’t need to worry about something burning while you’re prepping the next ingredient. The downside is that you’ll end up dirtying extra cups and dishes. I used to not do mise en place until I got tired of getting a quarter of a way through a recipe and discovering I was missing a key ingredient. Split your ingredients into the Bananas Foster and Cupcake teams. 

Bananas Foster ingredients:

fosterteam

Cupcake ingredients:

cupcaketeam

Don’t forget to get something to drink, too. Here I have a Red Bull, some water (natch), and a bitter reminder of last night.

drinks

Soft, soothing music is good. Did you know that listening to music makes time go by faster? It’s because of that whole brain power processing more than one thing thing. Today’s music is Euphoric Trance MegaMix Vol 6.0 

Start by making the bananas Foster. Melt the butter and brown sugar together over medium-low heat. Use a whisk to blend everything nice and smooth. Ignore the wooden spoon – I don’t know how it got there.

butterandbrownsugar

Once the mix starts bubbling, toss in the bananas and cinnamon. Make sure to keep stirring, scraping the bottom so the sugar doesn’t burn. (NB: sugar burns very quickly.)

cookedbananas

Stir the bananas for about 3-4 minutes, then turn off the stove and add the rum and vanilla. Grab a barbecue lighter and torch that sucker! Switch to a metal spatula and stir everything together while it’s burning. The flames will die in a minute.

lightitup

You can kind of see the flames in the picture below. The flames are blue and transparent because of the high alcohol content #science

flames

Put aside 1/3 cup of the bananas Foster to mix into the buttercream frosting. Let the rest cool on the stovetop while you mix the cupcake ingredients. Lifehack: Next time you make this, make extra and eat it with ice cream. Mmm.

icecream

Now for the cupcakes. Set the oven to preheat, 350 degrees. Mix the flour, baking soda, and salt together. In a separate bowl, cream the butter and sugar together. Creaming allows tiny pockets of air to mix in, making the cupcakes fluffy. Mash up the butter in a bowl until it’s broken up and soft, then slowly add the sugar as you mix. A electric mixer will make short work of creaming the butter and sugar, or you can use a wooden spoon and fork if you’re poor like me. 

creamed

Mix in the Bananas Foster (you made sure to put aside 1/3 cup, right?), then add the eggs, vanilla, and rum. Once you have that, alternate between mixing in the dry ingredients (flour, salt, baking soda) and the sour cream. Use a whisk to break up any large clumps of flour.

addingflour

Time to pour. This batter is a little greasy, so use foil cupcake liners. I also used a ladle to spoon it out, it’s pretty runny. 

readytopour

Bake for 20 minutes. The cupcakes are done when a toothpick stuck in the center of the largest cupcake comes out clean. You could also use a fork.

baked

Damn, looks good. It also smells good too. But they’re not ready yet! We need to make the frosting.

Bananas Foster Cream Cheese Buttercream

  • 8 ounces cream cheese, softened
  • 1 stick of butter, softened
  • 2-3 cups confectioner’s sugar
  • 2 tablespoons of rum
  • The rest of the bananas foster (1/3 cup)

So, here’s where the recipe went off the rails. Carlos suggested that we try Biscoff cookie butter instead of cream cheese and oh my dandy it was a good choice. So, feel free to substitute Biscoff. It made a lot of frosting, though. 

Cream together the butter and cream cheese/Biscoff. Slowly add the confectioner’s sugar, beating the whole time. Then add the rum and bananas foster. Make sure to really whisk it to break up the big chunks of bananas.

frosting

Keep stirring until frosting-like consistency is achieved. It will be a bit looser than most frostings. You can add more sugar to firm it up, but the cupcakes are pretty sweet as is! Lastly, frost the suckers. I was feeling lazy so Carlos and I used rubber scrapers. The first time I made this for a baking contest at work, I used a piping gun. I won the contest, by the way. These are award-winning cupcakes. 

done!

Done! Make sure to eat the rest of the frosting (buttercream = no eggs = no salmonella). I’ll clean everything later.